Pre-Existing Multi-Instance Install Support
For customers who use the multi-instance tools (Reporting Configuration Tool, SQL Configuration Tool, and eSuite Configuration Tool), follow the instructions below:
No action is required unless you need to create/modify an 2017.1/2018.1 instance after the 2019.1 release has been installed. Deleting an instance is not necessary. This scenario would be likely if 2019.1 was installed for a test environment where the SQL server is also hosting an HR Reporting instance for the 2017.1/2018.1 production environment. To manage an instance, perform the following steps:
-
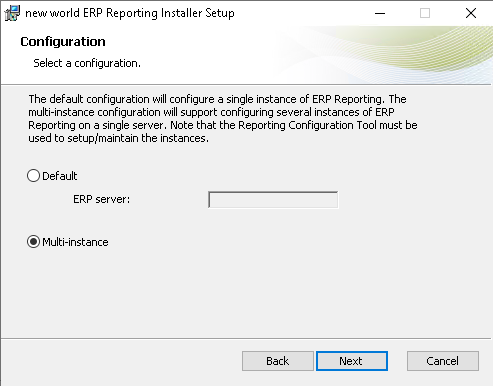
Run the 2017.1/2018.1 HR Reporting installer and select the “Multi-instance” option for the Configuration dialog.
-
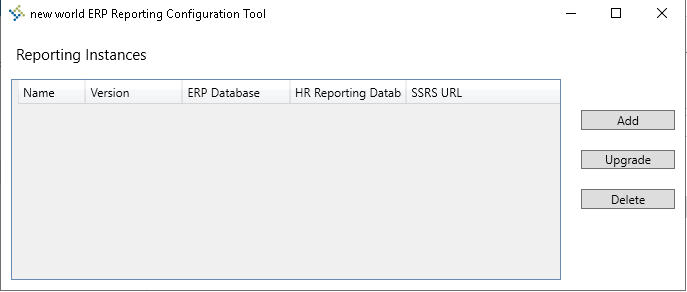
Use the Configuration Tool to add or upgrade an instance. Make sure to target the 2017.1/2018.1 ERP and HR Reporting databases and not the databases already upgraded to 2019.1.
Note: The tool will be uninstalled on the next 2019.1 New World HR Reporting deployment. If another instance needs to be added or upgraded, repeat the steps above.
No action is required unless you need to create/modify an 2017.1/2018.1 instance after the 2019.1 release has been installed. Deleting an instance is not necessary. This scenario would be likely if 2019.1 was installed for a test environment where the SQL server is also hosting an instance for the 2017.1/2018.1 production environment. To manage an instance, perform the following steps:
-
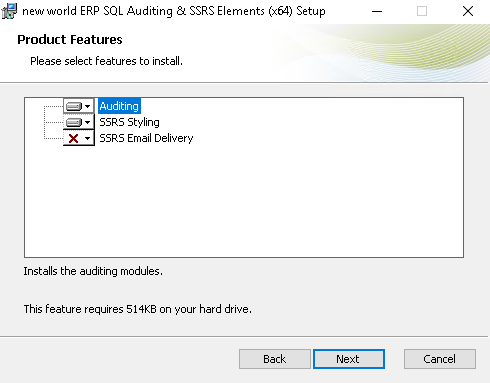
Run the 2017.1/2018.1 Auditing & SSRS installer and select the Auditing feature in the Products Feature dialog.
-
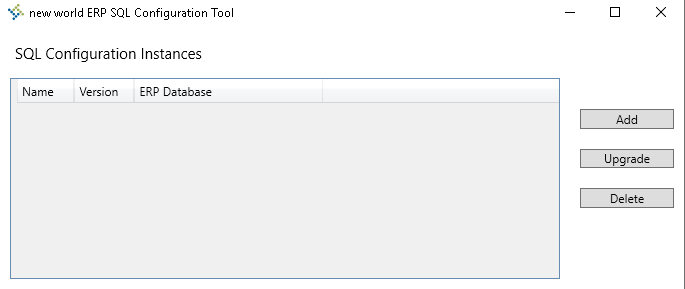
Use the Configuration Tool to add or upgrade an instance. Make sure to target the 2017.1/2018.1 ERP databases and not the database already upgraded to 2019.1.
Note: The tool will be uninstalled on the next 2019.1 New World ERP deployment. If another instance needs to be added or upgraded, repeat the steps above.
Prior to installing the 2019.1 eSuite Websites software, perform the following steps:
-
Launch the eSuite Website Configuration Tool.
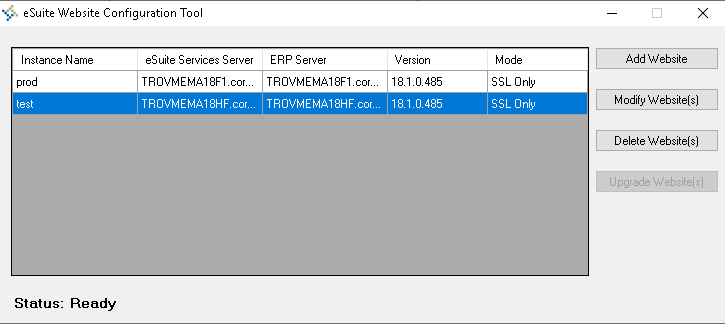
- Delete the instance (e.g. test) that is being upgraded to 2019.1 by clicking the Delete Website(s) button. The 2019.1 software will only be installed by Tyler Deploy and this tool is not used.
- Note the other instances that need to be replaced. The steps below will need to be performed after installing a 2019.1 eSuite Website instance.
After the 2019.1 eSuite Website project has been installed, the eSuite Configuration Tool will have been removed from the server. Also note that the eSuite URL will be different. The URL for an instance created by the eSuite Website Configuration Tool is https://server/eSuite_<Instance Name>/<eSuite Website (e.g. Websites.HR.Portal)>. If stacking several 2019.1 eSuite Websites on a single server, the Enable Multi-instance Mode check box must be enabled in Tyler Deploy for the New World eSuite Websites project for each environment and tenant. If using the Enable Multi-instance Mode option, it must be enabled for all the other projects (e.g. New World ERP and New World eSuite Services). The new URL will be https:/server/<Instance Name>/<eSuite Website (e.g. Websites.HR.Portal)>.
Perform the steps below to add, delete, modify, or upgrade existing 2017.1/2018.1 instances after a 2019.1 instance has been installed:
-
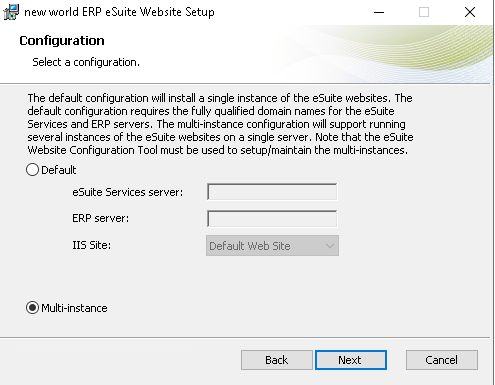
Run the 2017.1/2018.1 eSuite Websites installer and select the “Multi-instance” option on the Configuration dialog.
- Use the tool to add, delete, modify, or upgrade an instance. Make sure only to delete an instance that is going to be updated to 2019.1. The add, modify, and upgrade feature is for maintaining instances running 2017.1/2018.1.
Note: The tool will be uninstalled on the next 2019.1 New World eSuite Websites deployment. If another instance needs to be added or upgraded, repeat the steps above.